Step 1 of 4: Setting Up the Application
In This Topic
In this step, you will create a new Universal Windows application using RangeSlider for UWP.
- In Visual Studio, select File | New Project.
- In the New Project dialog box, select Templates | Visual C# | Windows | Universal.
- From the templates list, select Blank App (Universal Windows) and give your project a Name, and select OK.
- Add the following assembly to your application by right-clicking the References folder and selecting Add Reference:
- In Design view, click once within the Grid in your application.
- Navigate to the Toolbox and double-click the Rectangle icon to add the standard control to the Grid.
- In the Design pane, move and resize rectangle1 to fill the center of the Grid.
- Switch to XAML view and add a Fill to the <Rectangle> tag so it appears similar to the following:
| XAML |
Copy Code
|
<Rectangle Name="rectangle1">
            <Rectangle.Fill>
                <LinearGradientBrush x:Name="colors">
                    <GradientStop x:Name="goldcol" Color="Gold" Offset="0" />
                    <GradientStop x:Name="blackcol" Color="Black" Offset="1" />
                </LinearGradientBrush>
            </Rectangle.Fill>
</Rectangle>
|
- Run your application now and observe that it looks similar to the following:
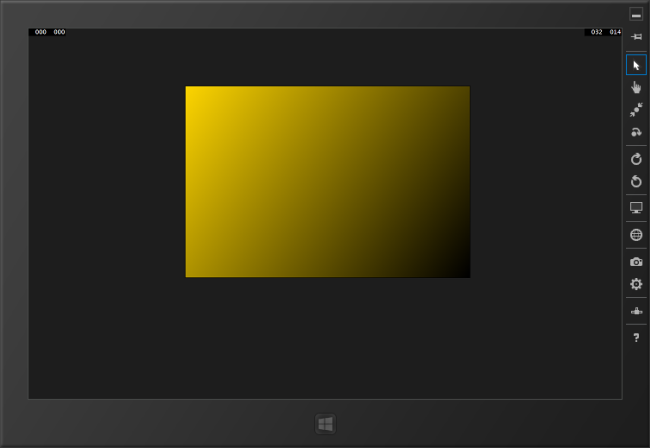
You've successfully created a Universal Windows application and customized the Rectangle control. In the next step you'll add and customize the C1RangeSlider control.